Flutter
Quickstart
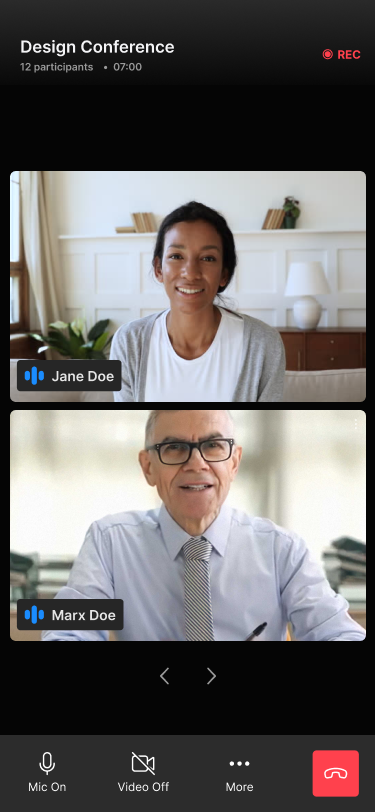
This quickstart shows how to add Dyte's Interactive Livestream SDK to your Flutter applications.
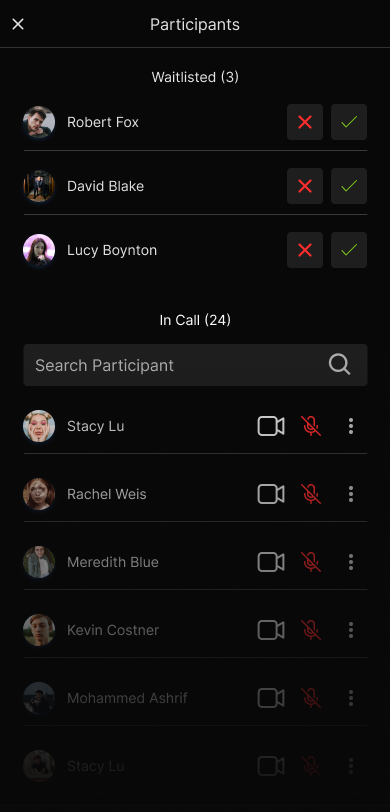
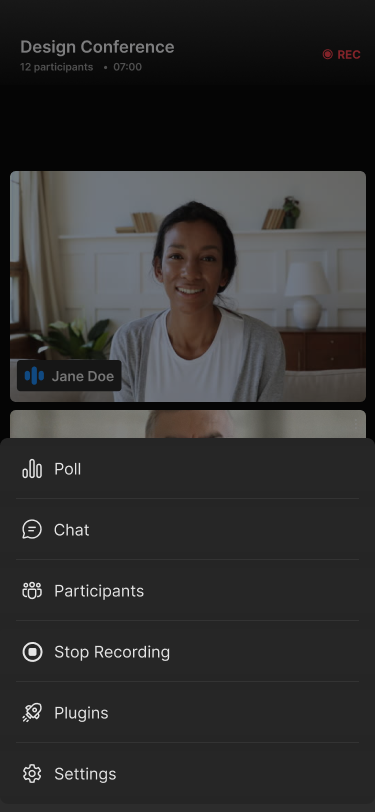
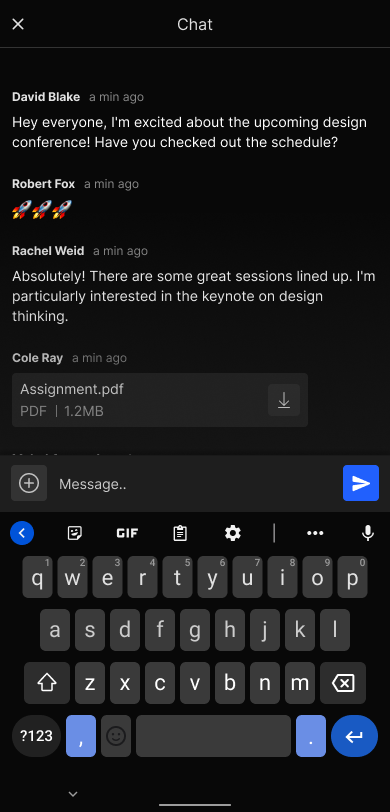
Further down this guide we also explain how Dyte's UI component library can help to build your UI faster with components specially made for Interactive Livestream applications.
You can also checkout our sample code for Flutter. You can clone and run a sample application from the Flutter Samples GitHub repository.
Before Getting Started
- Make sure you have a mechanism to get
authTokenfrom your server side which you would have received as part of Add Participant call.
Step 1: Install the SDK
Install the SDK from pub.dev.
flutter pub add dyte_uikit
Step 2: Configuring Android & iOS permissions
-
Android
Set
compileSdkVersion 33&minSdkVersion 21insidebuild.gradlefile at<project root>/android/app/build.gradlefile.defaultConfig {
...
compileSdkVersion 33
minSdkVersion 21
...
}
And change the kotlin version to 1.9.0
ext.kotlin_version = '1.9.0'
-
iOS
- Set minimum deployment target for your Flutter app to 13.0 or higher.
platform :ios, '13.0'- Add the following keys to your
Info.plistfile, located in<project root>/ios/Runner/Info.plist:
/* Attach the permission to use camera & microphone. */

<key>NSCameraUsageDescription</key>
<string>For people to see you during meetings, we need access to your camera.</string>

<key>NSMicrophoneUsageDescription</key>
<string>For people to hear you during meetings, we need access to your microphone.</string>
Step 3: Configure a Dyte meeting
To initiate Dyte Meeting for any participant you just need to pass authToken as an argument. You can get the authToken via the Add Participant API.
| Name | Description |
|---|---|
authToken | After you've created the meeting, add each participant to the meeting using the Add Participant API (The presetName created earlier must be passed in the body of the Add Participant API request) The API response contains the authToken. |
After getting the authToken, you need to create the DyteMeetingInfoV2 object as follows:
final meetingInfoV2 = DyteMeetingInfoV2(authToken: '<auth_token>');
Step 4: Initialize the SDK
The DyteUIKit is the main class of the SDK. It is the entry point and the only
class required to initialize Dyte UI Kit SDK.
/* Passing the DyteMeetingInfoV2 object `meetingInfoV2` you created in the Step 3,
   and your context in `clientContext` parameter. */

final DyteUIKit uiKit = DyteUIKit(
  meetingInfo: meetingInfoV2,
  clientContext: context,
  configurations: configurations, //optional
);
Step 5: Launch the meeting UI
To launch the meeting UI all you need to do is call the loadUI() method of the DyteUIKit object which will return a Widget. You can push this widget as a page to start the flow of prebuilt Flutter UI Kit.
import 'package:dyte_uikit/dyte_uikit.dart';
import 'package:flutter/material.dart';
class DyteMeetingPage extends StatelessWidget {
const DyteMeetingPage({super.key});
Widget build(BuildContext context) {
...
// Push this widget as page in your app
return uiKit.loadUI();
}
}
Voila! You're all done.