iOS
Quickstart
This quickstart shows how to add Dyte's Interactive Livestream SDK to your iOS applications.
Further down this guide we also explain how Dyte's UI component library can help to build your UI faster with components specially made for Interactive Livestream applications.
You can also checkout our sample code for iOS. You can clone and run a sample application from the iOS Samples GitHub repository.
Before Getting Started
- Make sure you have a mechanism to get
authTokenfrom your server side which you would have received as part of Add Participant call.
Step 1: Install the SDK
- Add the following line to your
Podfile
pod 'DyteUiKit'
- Install the client SDK as CocoaPods dependency
pod install
- Add the fonts and permission entries in
info.plist- the strings are displayed in the permission pop-ups, feel free to customize them to suit your audience
<key>NSBluetoothPeripheralUsageDescription</key>
<string>We will use your Bluetooth to access your Bluetooth headphones.</string>
<key>NSBluetoothAlwaysUsageDescription</key>
<string>We will use your Bluetooth to access your Bluetooth headphones.</string>
<key>NSCameraUsageDescription</key>
<string>For people to see you during meetings, we need access to your camera.</string>
<key>NSMicrophoneUsageDescription</key>
<string>For people to hear you during meetings, we need access to your microphone.</string>
<key>NSPhotoLibraryUsageDescription</key>
<string>For people to share, we need access to your photos.</string>
Step 2: Configure and Launch UI
To set the initialization properties in the DyteUiKitEngine class, simply initialize DyteMeetingInfoV2 and provide the participant's authToken.
Try this in viewDidAppear()
| Name | Description |
|---|---|
authToken | After you've created the meeting, add each participant to the meeting using the Add Participant API (The presetName created earlier must be passed in the body of the Add Participant API request) The API response contains the authToken. |
import DyteUiKit
import DyteiOSCore

class ViewController: UIViewController {

    override func viewDidLoad() {
        super.viewDidLoad()
    }

    override func viewDidAppear(_ animated: Bool) {
        super.viewDidAppear(animated)
        DyteUiKitEngine.setupV2(DyteMeetingInfoV2(authToken: authToken,
                                                enableAudio: true,
                                                enableVideo: true,
                                                baseUrl: baseUrl))

        let controller = DyteUiKitEngine.shared.getInitialController { [weak self] in
            guard let self = self else {return}
            self.dismiss(animated: true)
        }

        controller.modalPresentationStyle = .fullScreen
        self.present(controller, animated: true)
    }
}
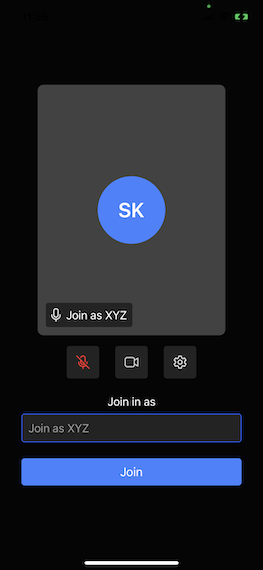
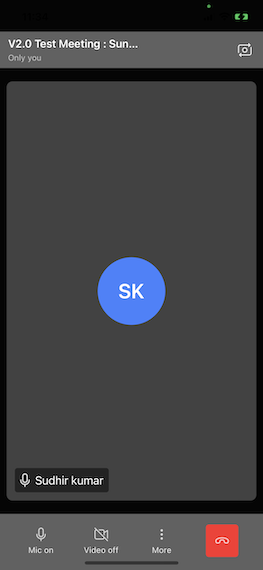
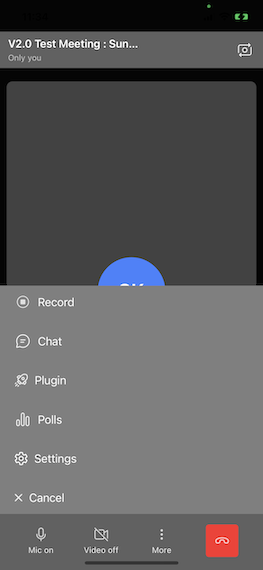
Here is a pictorial representation of all the config options defined below.