Start Building
The new Chat SDKs are currently in beta and may not be available for your organization by default. If you would like to use this feature, please contact us and we can enable it for you.
Chat SDKs are still in the testing phase and may undergo some changes. If you encounter any issues or have suggestions for improvements to the feature, please connect with us.
Step 1: Get your API Keys
Login to the Developer Portal and create an account. Copy the API Keys for your organization from the Developer portal. These API Keys are unique to your organization and are required to use Dyte REST APIs such as when instantiating a meeting.
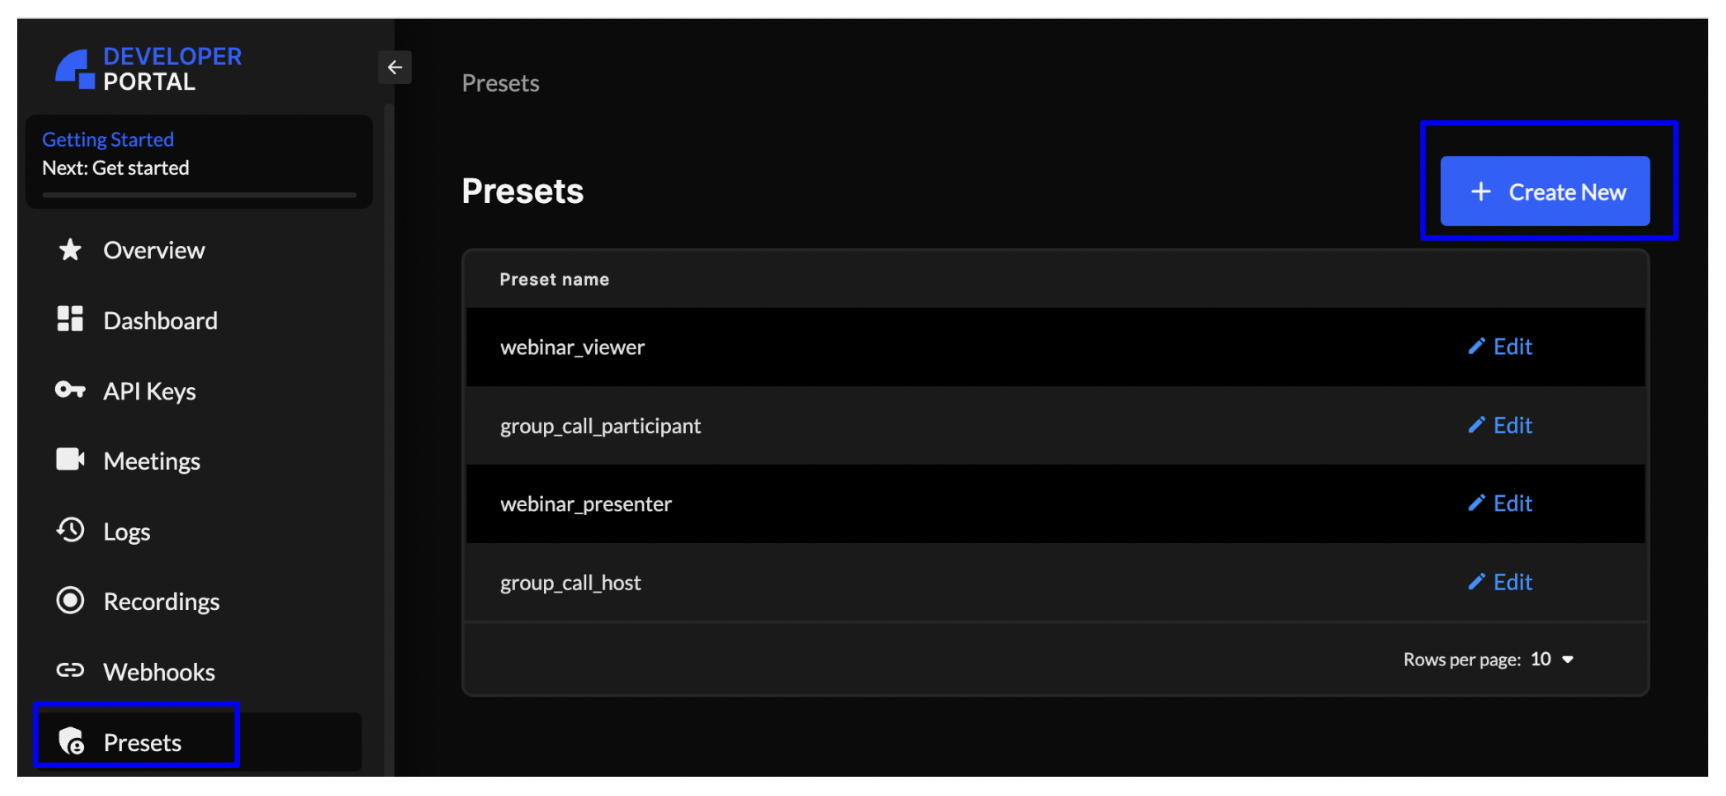
Step 2: Create Presets
A preset is a set of permissions and UI configurations that are applied to hosts and participants. They determine the look, feel, and behavior of the livestream, with options to set varied permissions, such as the ability to create polls or chat, control access for plugins, and more.
- In the Developer Portal, click Presets, and click Create New.
- In the Select Meeting Type, select Chat.
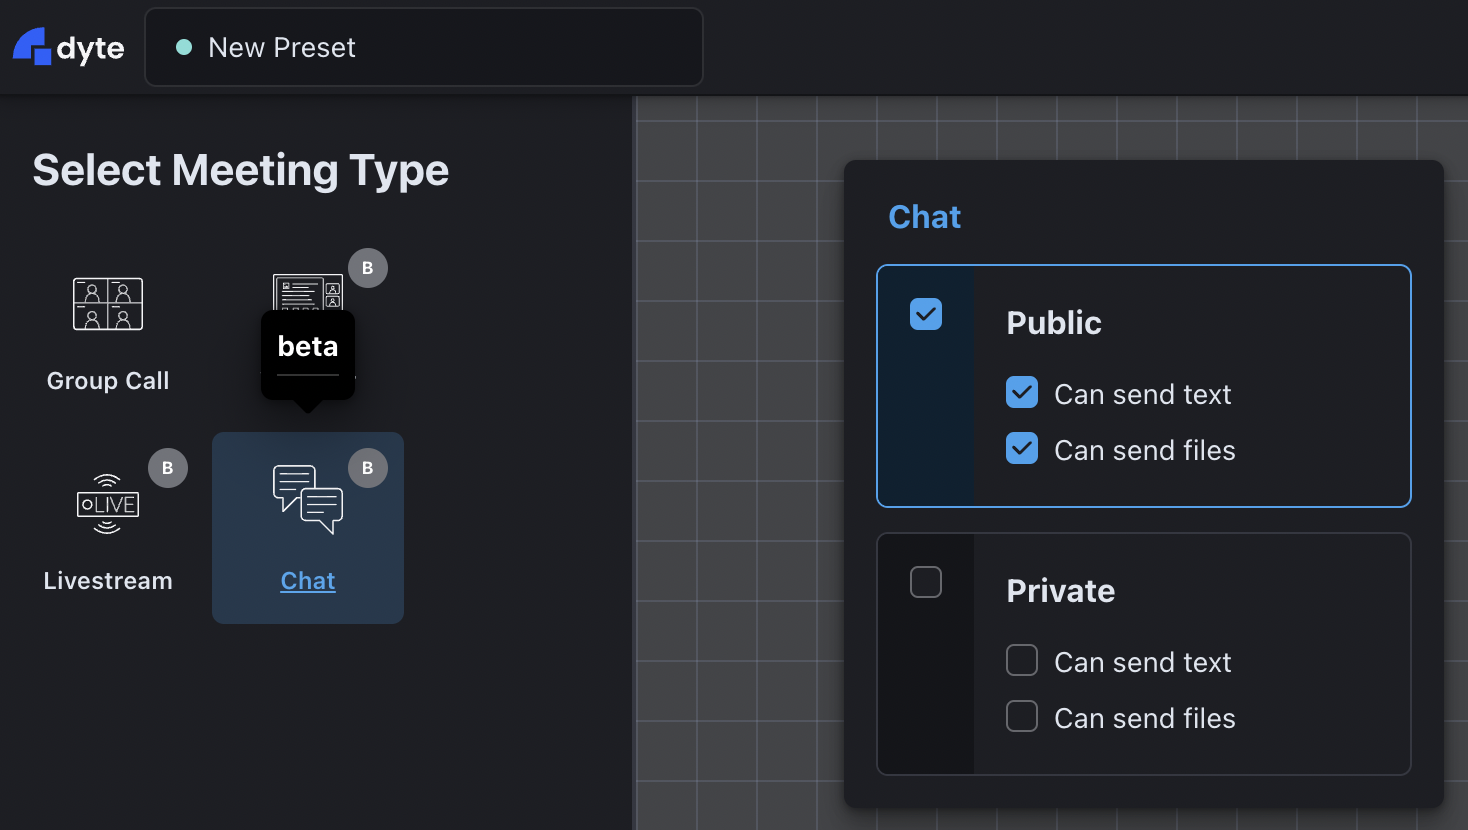
- Set permissions and UI configurations for your Chat.
Step 3: Save the Preset Changes
- Once you've made all the changes that you need to add to your preset, click Save at the right-corner.

- Enter the name for your preset and click Save.
Step 4: Create a Meeting
Create a Dyte meeting using the Create Meeting API. This API returns a unique identifier for your meeting. A Dyte meeting is your workspace where you can add members and create channels.
Step 5: Add Participants
After you've created the meeting, add participants to the meeting using the Add Participant API.
The preset created in the previous step must be passed in the body of the Add Participant API request. Specify the name of the preset in the preset_name parameter.
This API returns the authentication token that is required to initialize your frontend SDKs.
Step 6: Initialize the frontend
-
Install the frontend client.
npm install @dytesdk/react-ui-kit@staging @dytesdk/react-web-core@staging -
Initialize the frontend client by passing the authentication
tokenreceived from the Add Participant API.import { useEffect } from 'react';
import { useDyteClient } from '@dytesdk/react-web-core';
import { DyteUiProvider, DyteChat } from '@dytesdk/react-ui-kit';
export default function App() {
const [meeting, initMeeting] = useDyteClient();
useEffect(() => {
initMeeting({
authToken: '<auth-token>',
});
}, []); // effect is executed only once
if (!meeting) return 'Loading...';
return (
<DyteUiProvider meeting={meeting}>
<DyteChat />
</DyteUiProvider>
);
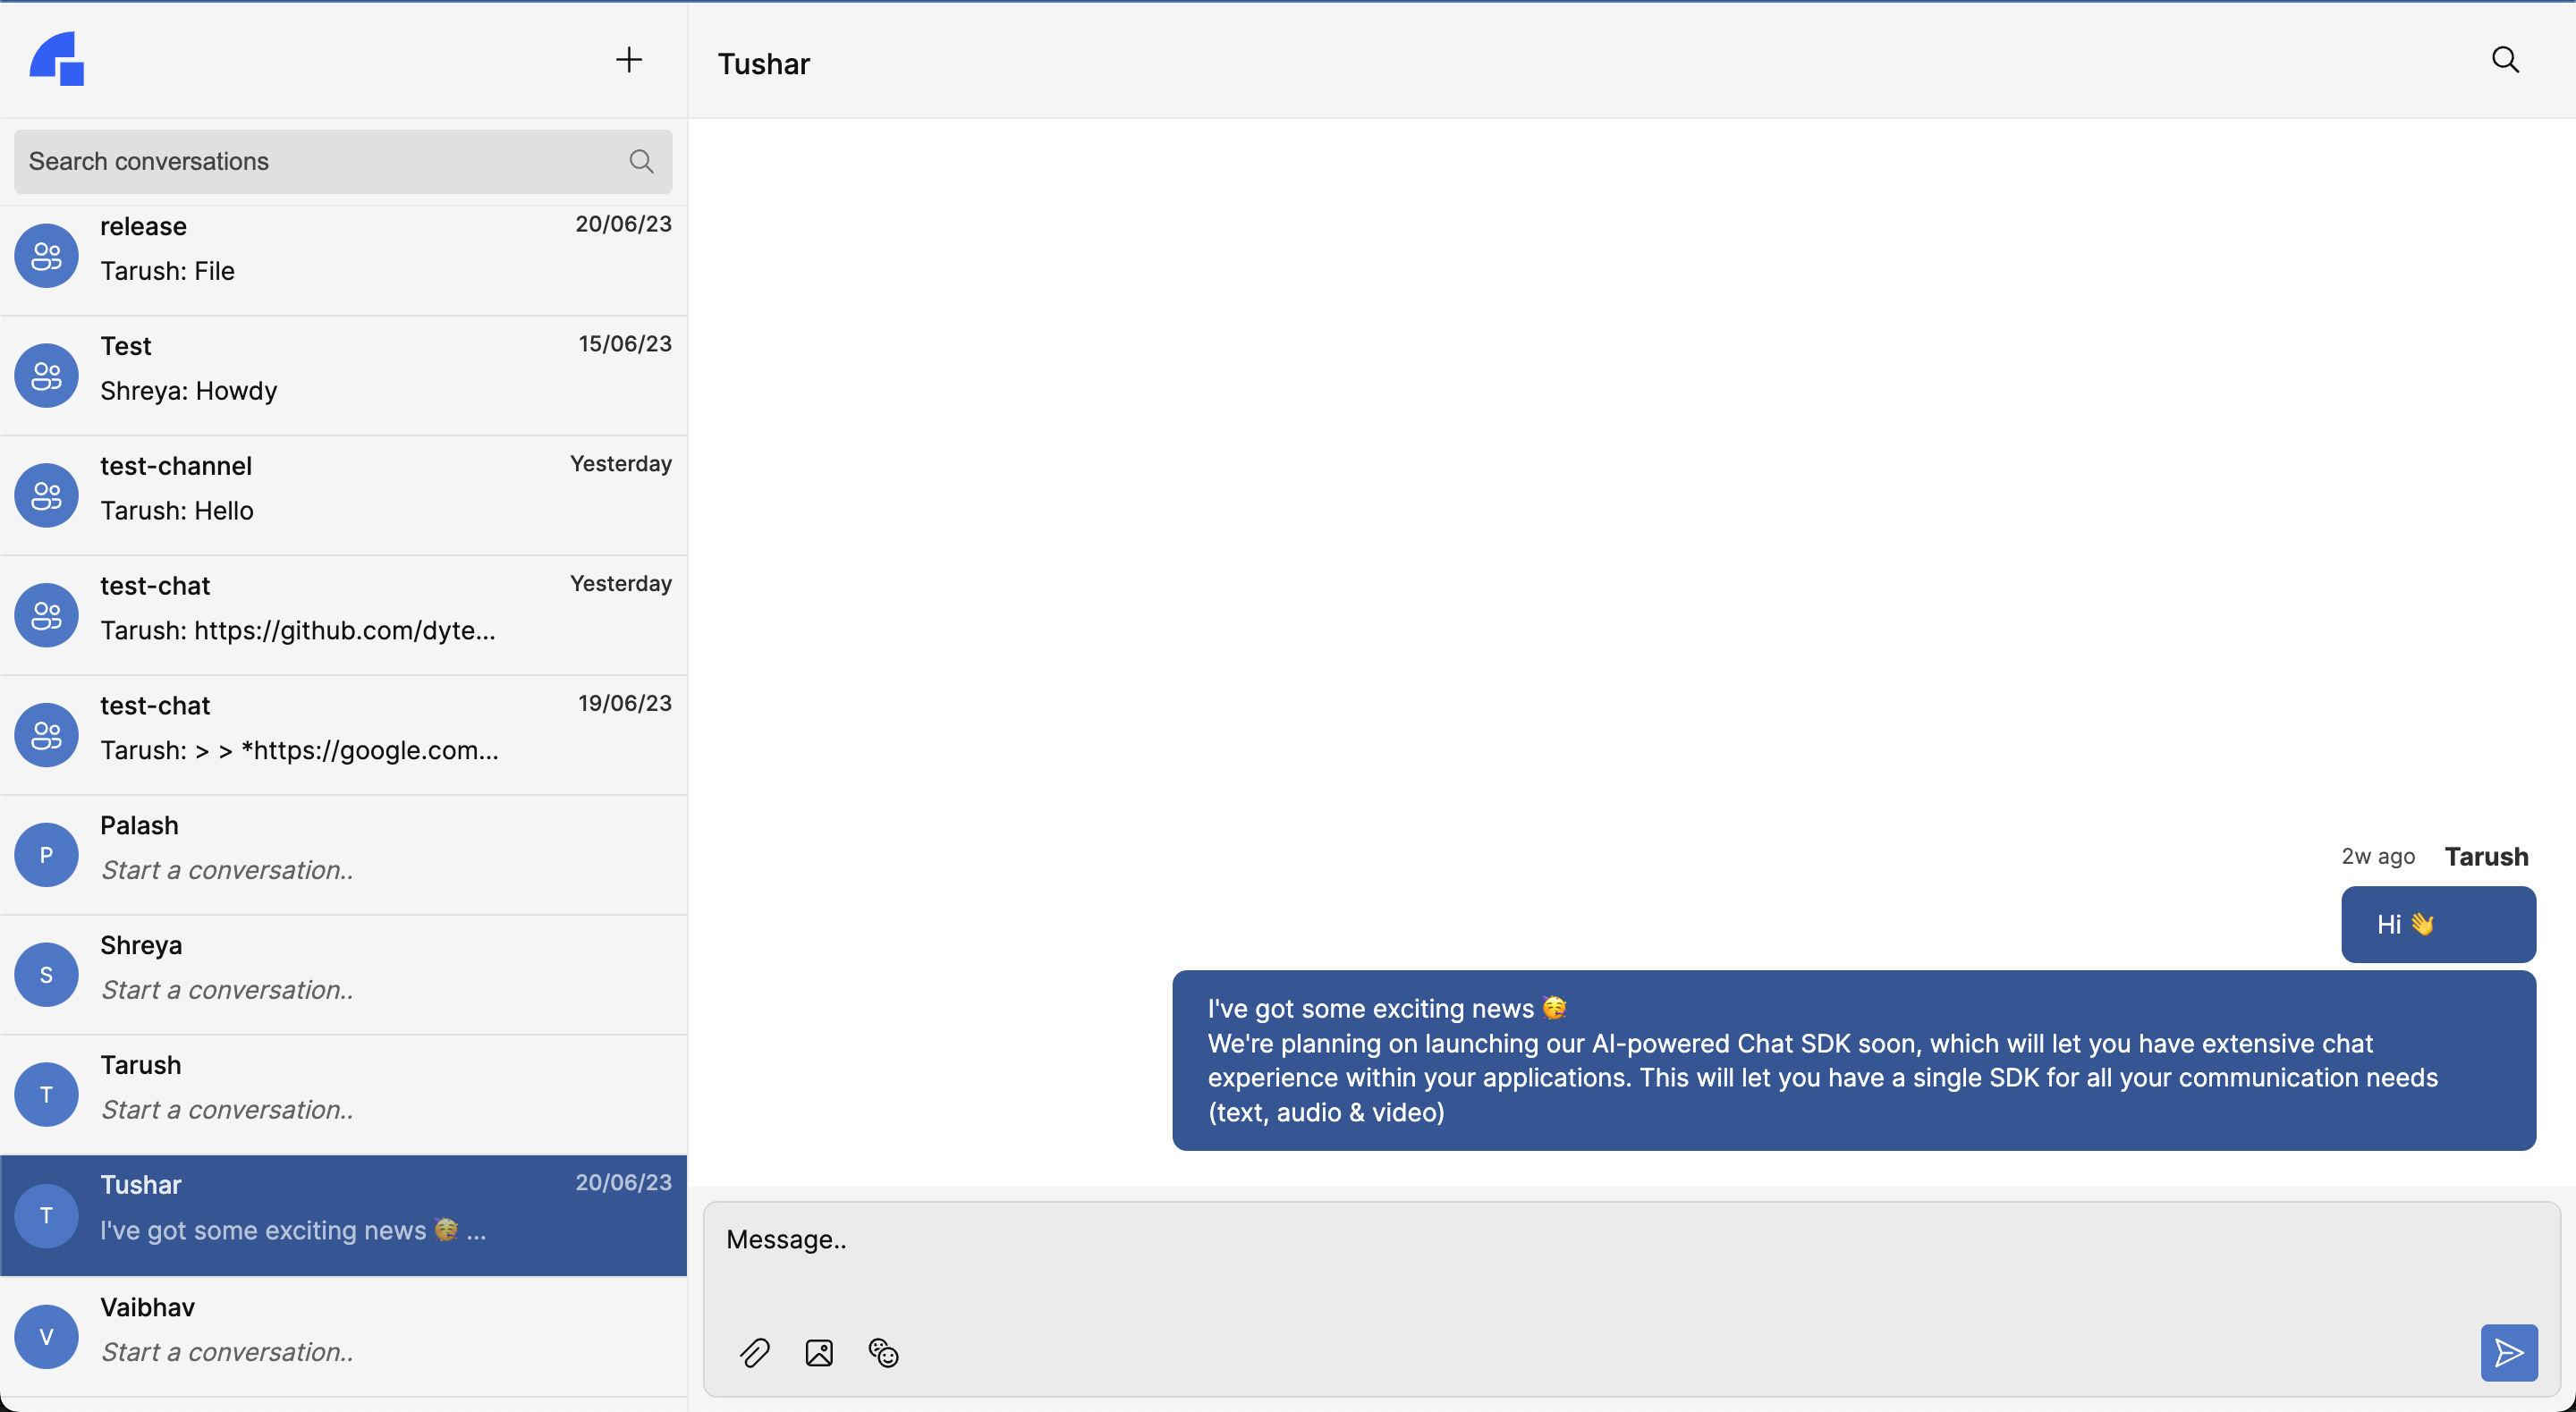
}You have successfully set up a fully functional chat meeting.